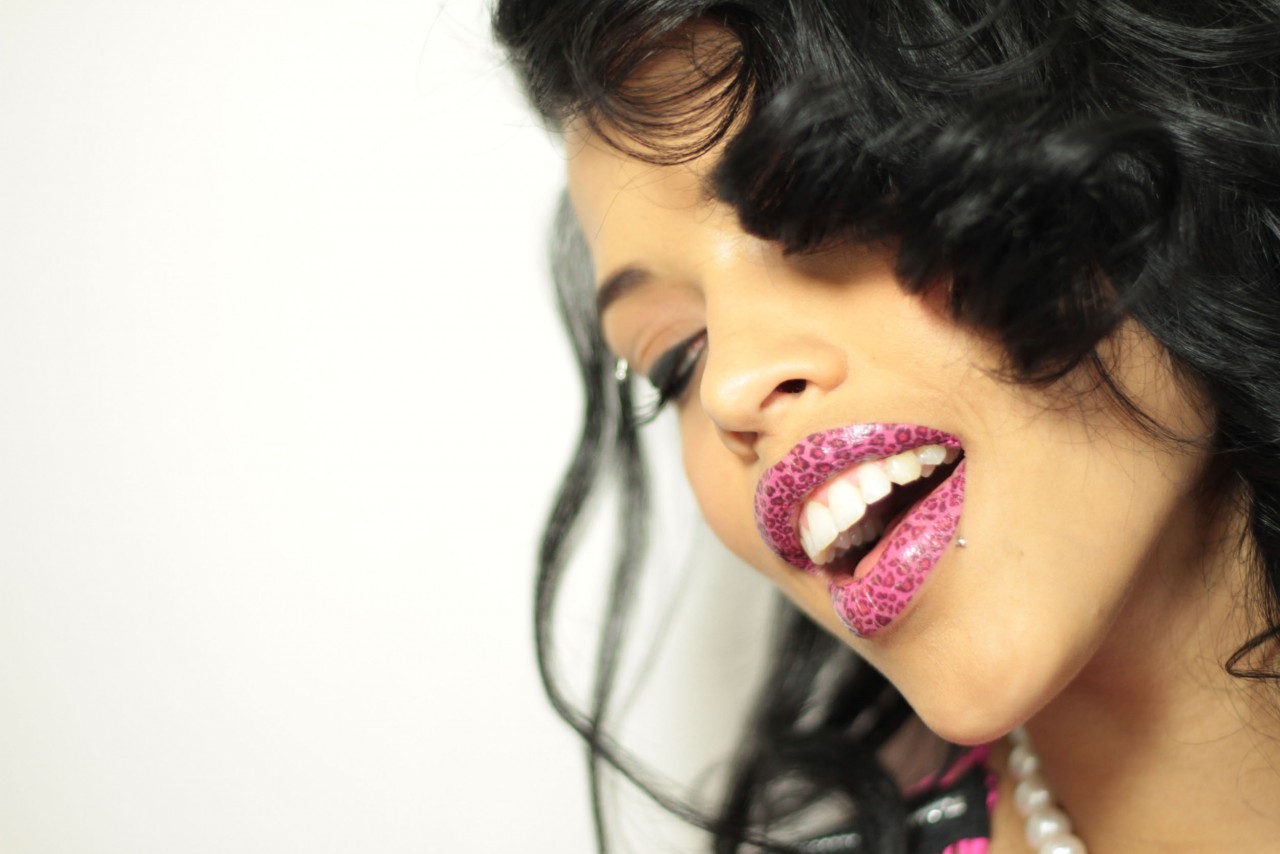
Showing posts with label Make Up. Show all posts

Review: Mary Kay CC Cream + Giveaway!

I remember a time when the BB cream which is short for Beauty Balm was all the rage, because it was somewhat like a light foundation which can do many things from giving the face a flawless finish, to reducing pore size, healing breakouts, controlling oil and correcting uneven skin tone. Those are just some the many benefits of the BB cream.

And now, with the introduction of the CC cream which stands for Colour Correcting cream, it has all the similar benefits just like the BB cream. Think of it as a more refined BB cream, after much research work has been on the BB cream. I have only tried a CC cream once and I did quite like it. And now, I have been given the opportunity to review the Mary Kay CC Cream Sunscreen SPF 15.

If you haven’t heard of Mary Kay before, it is probably because it isn’t one of those beauty products which are sold over the counter. Basically, you’ll need to get in touch with Mary Kay beauty consultants to purchase these products. :) You can locate a beauty consultant here; http://www.marykay.com.my/beautyConsultantLocator.aspx.

Before I move on, let me briefly explain about the Mary Kay CC Cream Sunscreen SPF 15. As the name suggests, it contains sunscreen along with the CC cream. However, it only has SPF15 which is actually more suited to be worn just indoors. Besides that there are 8 benefits of the CC cream and they are;
  1. Protects
  2. Brightens
  3. Corrects with lightweight coverage
  4. Minimizes redness
  5. Conceals
  6. Hydrates
  7. Reduces visible signs of aging
  8. Defends
Now, I won’t be able to tell you for sure whether I experienced all 8 benefits but I can tell you what I felt after using the product and how the product is like for my skin. For your information, I have an combination skin with a oily T-zone. Anyway, enough of my ramblings, let’s head on over to my review on Mary Kay CC Cream Sunscreen SPF 15.


This is how the product looks like and as you can see it comes in one size of 29ml. The CC cream I have here is in the shade of "very light". Earlier in the post, I mentioned that CC cream was also known as Colour Correcting cream, but in this case the CC cream Mary Kay actually stands for Complexion Corrector cream. When I first unboxed the product, I thought it was another “squeeze” type which was what most my BB creams were. Personally, I am not too fond of those.


But to my surprise, it is actually “pump-like” dispenser type which was completely a surprise! I love this dispensing type because I think these are neater and more hygiene compared the earlier “squeeze” type. The best part is that with a pump, it’s easier to control the amount of product. Almost with the “squeeze” type, I always end up with too much product on hand.


I don’t think you need a caption to let you know which was the picture before I had the cream on and the one after, with the cream. From the picture on the left, you can see how my cheeks and forehead is kind of flushed. But with the CC cream over it, my skin appears toned and flawless too. At first, I thought the cream didn’t provide enough coverage for me. But after application, I can see that it provided me with sufficient coverage although not as thick as what a foundation does.

But a foundation has a different purpose, this CC cream is more of a light weight one and my skin can still breathe with this product on. It almost feels like I don’t have any product on, and personally that is how I like my beauty products to be like. Which explains why I only use water-based products which absorbs quickly. I had the product on for about 6 hours throughout dinner and till I’m back home, and my skin was still flawless with minimal oil on my T-zone area. This could be because the product have enough moisture for me, because one thing for sure I didn’t feel like it was drying on my skin.

I used a total of three pumps of the product to achieve the look as pictured. Although the cream is best applied using fingertips, but I found it difficult to evenly apply the cream. Hence, I used the stippling brush as pictured to apply. I think the reason why it was difficult to apply was because before application of the CC cream, I had applied a primer on my face. The primer may not have been suitable to use together with the CC cream.

Overall, I liked the CC cream and how it looks like on my skin. This would definitely be my go-to product when I’m planning to head out with a au naturel look. More often than not, I find putting on foundation suffocates my skin when I leave it on my face for hours long. So, I would recommend this product if you want to achieve flawless yet natural look. And if you’re like me, you don’t know whether to put sunscreen before or after foundation, you can save yourself the hassle of figuring that out and just use one that already has sunscreen like this Mary Kay CC Cream Sunscreen SPF 15.

And that’s all for my review on the product! If you’re still reading, guess what? I have a lovely surprise waiting for you. The awesome peeps at Mary Kay have given some fantastic product to give them to my readers to try some of Mary Kay’s products! With me here, I have the Jelly Lip Gloss and the Baked Eye Trio eye shadow. I wish I could keep one set for myself, but then again, I love my readers and I would love for you to try the products out!


So, how do you win these two goodies from Mary Kay? Super easy peasy, all you need to do is leave a comment (with your email) below on why you want to win the lip gloss and the baked trio eye shadow! :)

But to increase your chances, you can tweet about the giveaway and share this post on Facebook (do set it to public and leave the link in the comment below!). Please tag me on Twitter if you do tweet, so that I get notifications. Remember to leave your email, so that I can get in touch with you as I’ll be posting the prizes to you.

Also, you get brownie points if you follow my blog, Twitter or Instagram. (@itscarmenhong)

Rules:
  • The deadline for this giveaway is 16th June 2014, 10PM. 
  • I will pick the lucky reader and announce the winner here in this post, the next day ; 17th June 2014. 
  • You have to reply my email within 24 hours, or the prizes will be released to the next reader.
  • Winner will be picked based on creative, funny, witty comments, so go crazy! Show me your enthusiasm. :p

* * * * * * * * * *


By the way, Mary Kay is currently having the Dream Beautiful Model Search Contest www.marykaydbc.com.my, whereby ladies will stand a chance to be the Face of Mary Kay Asia Pacific. For all the girls/ladies out there who have only ever dreamt of becoming a cover model, here's a chance to realise that dream. :) 


And here are the steps to join the Dream Beautiful Model Search Contest, super easy! Read more here; http://www.marykaydbc.com.my/view/entry.html And on top of joining the contest, you'll get a free make over too. I am planning to join the contest too, (who doesn't want to be a cover girl?), let me just get in contact with my beauty consultant first! Tee hee!

Till next time,
xoxo


Make Up: Blusher, all that you need.

Yes, really.

Blushers are wonderful; sweeping it along the cheeks can help brighten up the face, almost instantly. That is why I almost never leave the house without putting some blusher on. Because I love them blushers so much, I thought why not create a make up with just blushers of different shade, along with foundation and a clear lip gloss? This feels like I’m doing a make-up challenge where you only use one main products to make up. Haha.

I gave this a try over the weekends and wore it to my friend’s birthday party. For this look, I really did just use blushers after putting on foundation. So, this was how my make up challenge attempt looks like;

blusher

Ta-da! I thought the only-blushers-look turned out pretty sweet and nice. As you can see I used blushers for my eyes and even the lips. :D Yeap, the lips too. That is why I said I needed a clear lip gloss, besides the foundation.

* * * * * * * * * *

the eyes

IMG_4492

This is how the eye make up looks like. So, basically I used two shades of blushers ― a deep reddish orange and a light pink one. (I’ll show you the colours later). Here are the steps to what I did;

  1. Apply the darker shade on to my eyelids first, using a eye make up brush.
  2. Then, using an angled eye brush, I lightly ‘drew’ an upward tip from the end of my eyes following the angle of my lower lash line. (This is the same technique I used to create the perfect winged liner. Read it here.) 
  3. After that, apply the lighter shade all over the eyes. Even over the darker shade. The point is actually to blend both the colours together so they don’t look too much of a contrast.

Just like that you’re done! If you like, you can put on some eyeliner. I didn’t because I was sticking to the only blusher, make up challenge. Haha. Honestly though, this eye make up brighten up my eyes and even without eyeliner, it looks good too.

IMG_4576The two shades of blusher I used.  The deeper shade was actually from my mom’s collection, and the lighter one was the one I use daily.

IMG_4573These are the brushes I used. The middle one is the angled brush and the other two are fluff eye brushes.


* * * * * * * * * *

the lips

IMG_4513I absolutely loved the colour of my lips! And to think that this came from a blusher.

IMG_4498

For the lips, I used the same blusher set from my mom. There are two colours there; the reddish one was what I used for my eyes. I loved the bright pink shade but I don’t have a lipstick in that shade. I thought it’ll be nice to give this colour a try on my lips. :) So, what I did was take a lip brush and get some of the blush on it. Then, mix the colour with some clear lip gloss and you’re good to apply that to your lips.

IMG_4499Make sure your hands are clean before you do this. Haha, As you can see, the clear lip gloss when mixed will become a pink gloss.


* * * * * * * * * *

It’s amazing really to know that all I needed for this look was blushers of different shade. Can I hash tag #mindblown? :3 

Who knew that there was other interesting ways to wear the blusher, than just on the cheeks? I guess this is what it means for a beauty product to do a double-duty, or in this case a triple duty. Cheeks, eyes and lips!

IMG_4527

IMG_4526My chubby cheeks and me, being silly. :p

* * * * * * * * * *

I hope you enjoyed reading this post and if you tried this look, or even the make up challenge, I would love to see how it looks! :)

Till next time, xoxo

Review: Rainbow Lip Sticker! | Temporary Lip Tattoo

IMG_3091

If you remember, I blogged about the lip sticker in this post. For that post, the sticker I tried on was in 046, which Jason thought looked like ‘lap cheong’, also known as Chinese sausages. Or even salami, he said. Well, the only thing anyone can say about this lip sticker is rraaaaaaiinnnboooooowww. 

IMG_2870-2-3

I have always wanted to try to have rainbow lips, so having the lip sticker in this design was just awesome pawsome! But honestly, I hadn’t expected the colours to be so deep. I mean rainbow reminds me of happy cheery stuff, and the colours on this lip sticker are wee bit darker. But hey, it is still in the colour of the rainbow! Compared to the previous lip sticker I mentioned in this post, this one feels a bit dry. That is why you can see the liner on my lips.

IMG_3073-4oh, hi! *waves*

IMG_3027heh, because I can.

Wearing rainbow on your lips is bound to be a head turner, I mean who wears rainbow and shop in the malls, right? So, wear rainbow lips if you want to walk around with people bending over their backs, just to get a better look at you, the next time you head out. Give me a call when you do, and we’ll hang out. Tee hee.

How to: Winged (eye) Liner

Eyeliners was never really my must have make-up essential items; it was pressed powder back then, when my skin was still smooth and all I needed was powder. I used to think that, that was all I needed. Even when I saw my sister religiously wearing eyeliners whenever she heads out, I still hadn’t seen the wonders of eyeliners, yet. Then, one day I fell in love with the winged, cat eyed eyeliner look that was so in trend. The next day, I got myself a liquid eyeliner; it was the Maybelline HyperSharp Liner.

It did get me some time to get used to drawing a balanced eyeliner for both my eyes, especially since I immediately started off with liquid liner. Once I’m able to draw a balanced one, I went on to try the winged eyeliner! After many trial and errors, I finally managed to do a perfect winged eyeliner. My version is a somewhat casual with less drama compared to those we see on celebrities since those are actually longer.

I did a pictorial, because it is so much easier to have a picture by picture guide. I will also eleborate in details for each step, highlighting which steps were crucial. They are actually only 4 steps and with practice you can draw it under 5 minutes.

Winged Eyeliner copy

From the pictorial, I know it seems too easy but truth is, it is that easy once you get a hang of it. Since I was trying to make the pictorial as concise as possible, I’ll be elaborating more on each step.

The most important step of the four would be the first one, because that would be the line that helps to guide the winged liner. Think as though you’re using the eyeliner to extend the line of your lower lash line. There is a simple technique/trick called the tape trick or using a cellophane tape.

IMG_4051

So, what you’d basically do is get a cello tape and stick it slanted/angled according to your lower lash line. To avoid the cello tape to be too sticky, lightly pat the tape on the back of your hand before sticking them to your eyes. The tape only merely acts as a guideline, so once you’ve drawn the line, it’s best to peel it off.

IMG_4058

Moving on, the hardest step, in my opinion would then be the second one, where you have to draw the outline from the centre of the eye. I actually have a tip to make this step easier. For those who have double eye-lids, you can use the fold of your eyelid as the guideline to how thick you have to draw the eyeliner. For those who don’t have. you can decide on the thickness of your eyeliner according to how you would prefer it to be.

The third step basically involve filling in the outline that you have drawn earlier. Do this step carefully because you have to make sure it stays within the outline you have drawn. For the fourth step, it is just extending the line. If you’re not used to drawing your liner using liquid, best that you try to draw short lines instead of one slick line.

Ta-da, you’re done! Four simple steps to have that perfect winged eyeliner! I’ll show you a picture of my eyeliner; I had actually lined my waterline as well.

IMG_4070

I know it is a bit dramatic, because I kind of got carried away while drawing the eyeliner which actually happens pretty often. I am usually afraid of lining my lower lash line because the eyeliner would usually smudge, but the new K-Palette eyeliner I am using (which I will review soon!) almost doesn’t smudge! :D

I’ll end the post with a shot of my face, wearing the eyeliner. I do hope you found the tutorial very useful and good luck with drawing the winged eyeliner!

IMG_4078xoxo

Review: Temporary Tattoo Eyeliners | Stickers

Did you read my post on the amazing Lip Sticker? The one that gave my lips such edgy look? If you haven’t, you can read it here. What did you think about this trend? For me, I love how edgy it was; wear the Lip Sticker out, and you’re bound to get attention (read: heads will turn 360 degrees). Haha. So, it is not exactly a very, everyday-I-can-wear-this-out look.

Lip Sticker

Now that you have seen/read about the Lip Sticker, would you believe me when I say that there is already a sticker for eyeliners as well? But then again, with all the trends around these days, nothing would really come off surprising anyway. :x Anyway, the eyeliner stickers sounded quite interesting and I managed to get my hands on a few of them.

IMG_3884

This is how it looks like; there are five pairs of different designs in a pack. I had initially thought that they would be like a sticker; being able to peel it off from the film and then stick them on to my eyelids.

IMG_3885

Turns out that the application for this eyeliner was similar to the Lip Sticker, whereby the sticker/tattoo is transferred using water. I actually did a step-by-step photo instructions for this temporary tattoo eyeliner. Here it is;

Tutorial Eyeliner Sticker

  1. Cut out the design you want.
  2. Ta-da, I cut it like that.
  3. For this step, I had to be extra careful when I was cutting the bottom of the sticker.
  4. Remove the transparent film.
  5. Place it on your eye lids.
  6. Then, gently wet the sticker paper with water. Wet cotton balls can be used as well.

eyelinerAnd this is how it looks! :D So awww-sum right?

It was super easy and fun to do. The picture on the left is without any foundation and was taken immediately after I managed to stick it on. On the right, is after I put on some BB cream and touched up the eyeliner. Sometimes I find that when transferring, not all it will get transferred properly. It’ll like extremely tiny gaps, so this eyeliner sticker is best to use with an eyeliner. But mostly all I needed to do was to fill in the gaps only.

The product claimed to be able to last a few days and hence, it is known as tattoo eye liner. I was sceptical about it at first, so after the first time using it I didn’t remove it just to test how long it was able to last. On the second day, the eyeliner still looks almost as good as when it was first applied. It was only after the third day when the sticker was slowly wearing out, with more gaps. Again, these gaps can be filled up using eyeliner. So yes, I must say that it really does what it said to do.

But for it to last longer, you’ll have to try to avoid washing your eyelids like the rest of your face. Besides that, the removal of this sticker was very easy as well; I used olive oil and cleaned it using a cotton bud.

eyeliner2

And here you can see a collage of the different designs of eyeliners I used, according to the alphabets; a,b,d and e. I haven’t tried c yet To be honest, I didn’t like design e, because there was a gap, it ended up looking weird. So, I filled in that space using eyeliners instead.

After trying out most of the designs, I find that these eyeliners are simple enough to be worn out without looking over the top. But, it is uniquely designed so it doesn’t look too plain and normal. This set of eyeliners are actually the basic ones; there are two other fancy sets.

IMG_3882

If you have read my post on thirtyfour’s blackplatinum event, you may have saw that I was wearing one of the fancier eyeliner sticker. Here is a picture of myself with it. :)

IMG_3575

As you can see  I had minimal make-up on my face, except the lips because I wanted to focus to be on my eyes. I really liked how easy it was to do this, instead of having to spend like 20 mins on eye make-up, I was done in about 5 mins max.

Conclusion

This was quite a picture heavy post, thank you for reading it till here. So I’ll just give a final conclusion on what I feel about this product; super easy and convenient for those who look for something different from the usual drawn eyeliners. But since it have to be transferred, instead of sticking it on, that part can get a bit troublesome. Sometimes even, there are tiny gaps or the sticker wasn’t transferred nicely. That is when the old school eye liner would be useful.

* * * * * * * * * *

PS - I had actually realised that these were probably inspired from Dior’s Velvet Eye. After more Googling, I found out that Sephora and a number of other brands did come up with their own versions as well. But I’m guessing those didn’t take off as well as how Violent Lips succeeded with the Lip Sticker. And compared to this product which was transferred by water, Dior’s and Sephora’s one are made from velvet and can be stick onto the eye lids.

Review: Lip Sticker in 046 | Temporary Lip Tattoo

The-Pink-CheetahPicture: source.

Ever heard of temporary lip tattoo applique, or maybe of the brand, Violent Lips which had made them so popular? :) Well, these lip tattoos has been around since last year, and I’ve been eyeing to get them. It looks super wicked to me, (although I know some thought this trend was just ugly). So recently, I had a friend who managed to help me get them, but it wasn’t from the Violent Lips brand. But rather, it was from Lip Sticker.

IMG_3090

I was rather sceptical as whether it would really work or stick to my lips, as the ones by Violent Lips will. The method to applying the sticker was similar to the ones in Violent Lips where you stick it on the lips and use water to moisten the sticker. So, are you curious to see how it looks on my lips? Here it is!

IMG_2588 copy

I found that the stickers were super easy to stick on but you’ll have to be very careful when you stick it. It may turn out crooked, if you don’t gently stick them on. I have read that the original ones get a bit dry but this one that I tried on was pretty okay. I didn’t feel like I was wearing a sticker or did I feel like my lips were dry. I didn’t need to apply lip balm as well. It also lasted for quite a while, I wore them up to 6 hours and they looked fine. If I didn’t eat, it would still stay pretty. But of course, I had to have dinner and if you’re careful as you eat, it’ll still look okay.

IMG_2574

Here is a picture of myself wearing the lip sticker. I showed this to one of my friend and he said it so ugly, he wouldn’t walk beside me if I wore that. But another friend said it was unique and something different. What do you think about this lip sticker? I would admit this is a a very bold statement piece to wear out. To be honest, this is not very suitable for an everyday look, but if you’re looking to stand out at a event or a party, this would definitely work.

Do check my blog out in the next few days, I’ll be blogging more about the other designs I managed to get. Next one is rraaaaaaiinnnboooooowww lips!

PS: If you’re interested to get one, drop me a message. I might be able to get some for you. Haha.

Make Up: Summer Lips [Coral Pink]

After my first attempt on ombré lips (click here to read about it), I wanted to try out some more ombré inspired lips. I went to my mom’s room, ransacked her make-up collection and found a few lipstick which were too pink for her. Since she isn’t using them, I might as well ‘play’ with it. Haha. Anyway, I’m not much of a lipstick person, I like lip gloss more for obvious reason. But I do have one bright red lipstick from Inglot that I totally love, although it is always too dramatic to wear it out.

IMG_1818

Anyway, this time around I wanted to create another ombré lips with two different lipstick. The pink lipstick that I found from mom’s collection was a very pink pink one, and I have a coral orange lipstick that I have but would not ever dare to wear it out. But I thought the combination of the two would complement each other pretty well, two bright cheery colour. So, here is how it looks like;

IMG_1812

It didn’t turn out as ombré or gradient as I thought it would be, the colours actually complemented each other so well that it blended it together. Hence, the colours look rather similar and you cannot really tell it is two toned unless in picture. I really like how peachy the orange lipstick turned out to be and I think I ought to give it a try on its own. I love this lips make up and immediately, I thought of summer. It’s so bright and funky, no word can describe this lips make up better. So, what is your summer lips?

Make Up: Ombre Lips #1 [Extreme Pink]

I just love love the ombré colours that is everywhere these days. I first came across the word ombré when I was browsing for nail art inspirations, which resulted in a failed attempt. Click here to see what turned out from that failed ombré attempt. Anyway, just the other day when I was lying in bed, I wondered it the trend had caught on to make up; lips in particular. I went to Google some pictures up and ta-da…! (It was all over Tumblr too; link.)

ombre lips

I watched a few Youtube videos as well, and realised it was quite easy to do. And so, I gave it a try. Haha, my version look like this;

IMG_1595-4

So, what do you think of my version? It didn’t turn out as ombré as I expected it to be, looks more two toned than a gradient hue than I was hoping to achieve. Well, I’m definitely going to try out with other lipsticks and see how those turns out to be. For this, I used Clinique’s Extreme Pink (17) and a concealer was dabbed on lower lip to give the gradient effect. I really love this, but the problem was I kept smacking my lips together and that would ruin the design. The next time I do this, I must resist smacking my lips!

Till next time, lovelies. xoxo.