Showing posts with label Nail Art. Show all posts

Nail Art: flakies + glitters

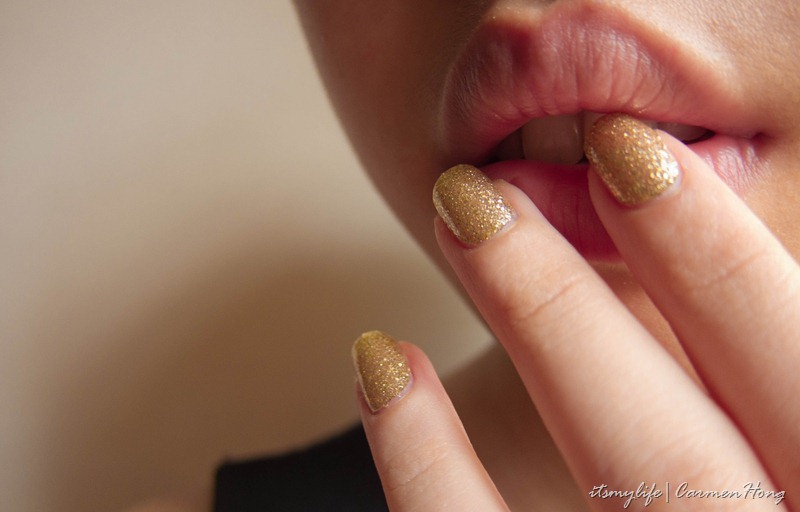
I know it’s been forever since I last painted my nails, did a nail art, shot my nails and what more, posted here about my nails. Which is pretty sad when I think about it, because there was a period of time or about a year that all my blog was is my NAILS. Haha, those were the days when I managed to grow my nails and have them painted every other week. But not, I just don’t have the time. I blog more about the food I EAT, which I have been going out pretty often lately. Anyway, I decided to play around with a couple of new polishes from The Face Shop; BK901 and Etude House; PWH902. And these were the results of the two mash up.

* * * * * * * * * *

OLYMPUS DIGITAL CAMERA

OLYMPUS DIGITAL CAMERA

OLYMPUS DIGITAL CAMERA

OLYMPUS DIGITAL CAMERA

* * * * * * * * * *

When I got my new camera (it’s called Gideon, but I don’t address it so) I got myself an Olympus 60mm lens too. It is a macro lens, a super powerful lens, but I didn’t try to shoot my nails with it. In fact, I don’t shoot much with it. Before and after I got my lens and camera, Jason had often nags me that I should read my manual and learn how to use my kit lens, what it can do and what it can’t do before actually trying out new lens. But I have been pampered by Alex, who loaned me his Leica 20mm and that I have also got my own 60mm to play with. I do try to shoot with my kit, I have had photographers telling me how I should use the kit as my main ‘weapon’.

But, hello! The 60mm produced these amazing pictures, which a kit can’t do. Yes, I did try. So, I’m going to try to shoot more with the 60mm for nails, because the amount of details this lens can capture is just, “Wow!”

* * * * * * * * * *

All pictures were shot with Olympus EPL5 using Olympus 60mm at f2.8, 1/125 sec and 1/160 sec with ISO 500 and 640. This was shot in a DIY light box placed outdoor with manual focus.

Nail Art: ‘Ming’ Dynasty’s Vase Inspired

It’s been a while since I last did a nail art, but I was at work when this nail art idea came to mind. There was a contest on Instagram, and the theme was vintage. A simple Google search on vintage nail art would show you images of those gorgeously hand drawn flowers painted meticulously over each nail. Unfortunately, I’m not that good, not even close to drawing anything on my nails. So, I thought about the vintage theme. And then, *snap*. One day, I saw a print of blue and white and I thought the ‘Ming’ Dynasty’s vase. Although, that is more antique than vintage. But hey, worth a shot. This was how the nails turn out to be.

20130224-IMG_7683

The polish I used for this were Sally Hansen's Blue It and a white stamping polish. The designs were stamped and this is my first time stamping so it didn’t stamped as neat as I hoped it’ll be. Well, practice makes perfect. :) I’ll be trying my hands on more stamping nail art.

20130224-IMG_7671

20130224-IMG_7693

20130224-IMG_7673

And here is the entry I submitted on Instagram.This was for a contest organized by @followthatway (a talented Singapore Instagram user who does these really amazing nail arts). Let’s hope I’ll get lucky :)

20130224-IMG_7675

Till next time, loves!

Keep Calm and Polish On.

Nail Art: Chinese New Year nails!

20130210-IMG_7418
What is Chinese New Year without loads of Mandarin oranges? Once you see these oranges, it can only mean that the Chinese New Year was around the corner. :) So, I thought it would have been appropriate to pose my nail with a Mandarin orange. Haha.

20130210-IMG_7421


Nail Art: Heart Shaped Matte Pink

heart mani

With the Internet these days, it has been so easy to find and share pictures of pretty nail art designs. There are so many nail arts that I have seen from the net that I wanted to try. In fact, I was so inspired by some of the gorgeous ones that I actually sketched them out (with guides and notes) in my sketching notebook. Anyway, before I get side tracked any further, I stumbled upon a picture on Pinterest (Yes, I’m on there. :] Follow my boards HERE.) of a super simple nail art; matte heart. It was such an easy nail art to do since you only need stickers + matte top coat, not forgetting the base colour too. So here is my version. :D

IMG_2358

How do you like my version? :) I used the Neon Pink polish from Elianto, which I swatched and reviewed before. Click here to read it.

IMG_2344

IMG_2353

So, how do to do this nail art? What you’ll need is a sticker. Draw a heart shape, cut that out and then paste it over your nail. The nails should be painted with a base colour before that. After pasting the sticker, top it off with a matte top coat. Whenever I use stickers for my nail art designs, I prefer to let my base polish to cool or dry for at least 24 hours because sometimes the sticker may be too strong and ruins the base colour, Just like that, and you’re done.

IMG_2347

You may notice that there is a white outline over the heart shape. That is actually because of the matte top coat. I used Essence’s Matt(e) Top Coat for this nail design and somehow, after I peeled off the sticker, it left a white outline. But fret not, it’ll be go off after sometime. Of course, if you’re irked by it like myself, you can slowly scrapped it off with your nails, like I did. Haha.

IMG_2357

It was a really simple nail art to do, something that I finished in less than 15 mins. To be honest, these days I find myself preferring to swatch instead of doing nail arts. Maybe I got lazier, :(. Which is why I am so going to make it point to do more nail arts. I know I’ll never be short of inspiration with the Internet these days, anyway.

Nail Art: Matte Black with Glossy French Tip

IMG_1394

You would have probably seen this nail art around, it was been done quite a number of times not only because it was uniquely nice but also because it’s superbly easy to do. All you’ll need for this simple nail art is a good black nail polish, matte top coat and a shiny top coat. :) Read on, I’ll post up the steps to this nail art.

ysllooknoel2011_thumb

Before I go on, I think this nail art was probably inspired YSL Duo Terriblement Noir black nail polishes. This was from the YSL Holiday Collection back in 2011. I absolutely love the matte black polish from YSL, read more about it here.

IMG_1398

Anyway, back to the nail art, in addition to the three items I mention above, you’ll need some cello tape or scotch tape or stickers. For this manicure, I used The Face Shop's BK901 , Seche Vite Top Coat and  Essence's Matt Top Coat. You can click on the links for my reviews. :)

* * * * * * * * *

Step 1: Paint your nails using black nail polish and finish it off with a top coat. Please allow it time to dry completely.

Step 2: Then, stick the cello tape just slightly over the tips of the nails.

Step 3: Paint your nails with the matte top coat. Wait till it is dry before removing the sticker.

* * * * * * * * *

And that’s it! It’s so simple. :) But just a note though, if you’re using Essence's Matt Top Coat, you may see that a thin white line between the matte and the shiny region. Need not worry about that because it is only temporary. If you cannot wait, then you can lightly scrap it off.

IMG_1401

IMG_1408

I hope you found the short tutorial useful, if you tried the nail art out, I would love to see them :) Thank you for reading this post, and do look out for more nail art. You can check the rest of my manicures here on Facebook or read about them here on my blog.

Nail Art: Neon Green Tips

Just the other day, I watched this video that blogger, Xia Xue did for ClickNetwork.tv and her nails in the video caught my eye. It was nothing fancy, very simple nail design. Her nails were painted at the tip in mint green colour. Very pretty, chic and simple. As you can see, I haven’t been painting my nails since I’ve been rather caught up with a lot of things. But this was so easy to do, so I decided to do it but in a different green colour. You’ll see it in the pictures below. 

ombre lips

And here is what my version looks like;

IMG_1582

Since I did my nails in a jiffy, I didn’t give my nails ample to dry and hence, it smudged a little as you can see. This was despite the fact that I used Seche Vite super fast dry top coat, because the polish I used was a rather old one. Hence. it was thick and very streaky. Also, the colour is a bit more neon than shown in the picture but I think the sun sort of lighten it up.

IMG_1588

IMG_1583

This is the first nail art I’ve done since like forever, I hope with this I can get my mood back to doing nail arts. :) Before work starts and I’ll be back to only French, nude or bare.

Nail Art: Black Gold Tipped (French Mani style)

IMG_3649

I have always wanted to do a French manicure with glittery gold tip and black polish! Finally managed to do them, after so long. Haha, the thing is I actually have quite a few nail art ideas and some of them are in queue. This was one of them. Heh.

IMG_3641

Like always, my French manicure are easy to do because I use stickers to guide me. And for this particular nail art, it was even simpler because the gold tip is from Sally Hansen's nail polish strips in Glitz Blitz (I blogged about it in details, so do read more about it if you’re interested in an easy peasy stick on nail polish.) All I had to do from paint the black polish over the glittery gold nail polish strips.

IMG_3639Ah, I love this shot of my nails. You can see the reflection of the blue skies and clouds, on the black polish.

IMG_3660And the blurred background, with the focus on the nail shot! <3

Review: Sally Hansen’s Real Polish Strips - Glitz BlitZ

IMG_3289
After the long wait, Sally Hansen have finally brought in the Real Nail Polish Strip product in! As always, you’ll find newer products being released overseas and boy, do they take some time just to arrive on our shores. Or worst, sometimes they wouldn’t even be sold over here. So, I couldn’t be happier when Yuberactive picked me to review this product in Glitz Blitz. :)
These polish strips are something similar to the stickers. All you got to do is stick these fancy designed strips on your nails. And, that’s it! You now have a very professionally done manicure. Easy peasy, right? Well, that’s the concept anyway. But is it really as easy as it claims to be? Does it last?
IMG_3276
When I first opened the sealed box of the strips, I was greeted by the familiar smell of nail polish. So, in actual fact, these strips are really nail polish and not printed ones because the latter may come off as a bit fake. In each sealed box, there were 8 sizes of nail strips to choose from. To be honest, I felt the sizes were a little limited and most of them didn’t fit my nails. Also, these 8 strips are supposed to be for five fingers. Which leaves me to ask, “What do I do with the strips that do not fit my nails?”
IMG_3278
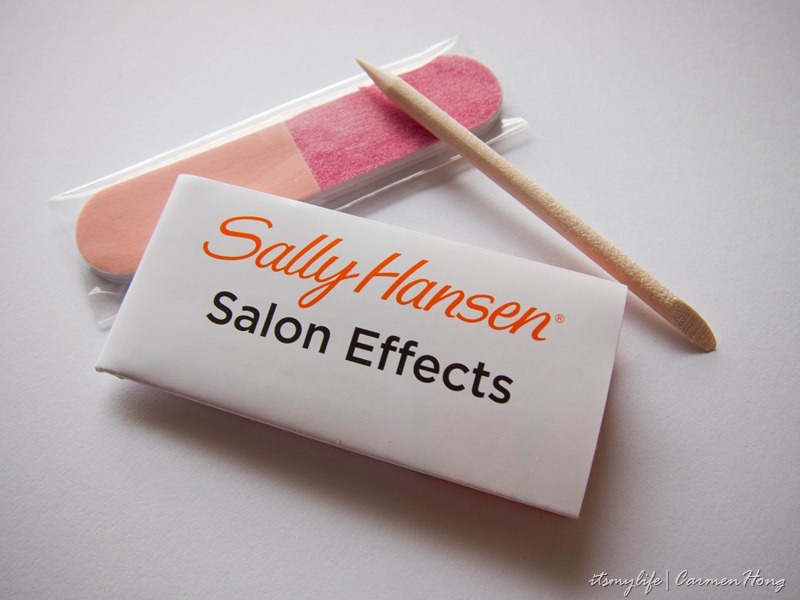
It also comes with an instructions booklet, mini file and a very useful cuticle stick. I won’t be going into the details on how to apply the polish strips because this is a review of the product (heh) and also, the given guidelines were quite direct and easy to understand. However, there was only one confusing part on whether I need to peel the strips off the paper after removing the protective layer. I found out later, that you do indeed need to peel it off and it wasn’t easy to peel it off at all.
IMG_3325
But I must admit, that the process of applying and sticking the strips were quite a fun one. In fact, the very idea that I don’t have to apply and wait for my nail polish to dry appeals very much to me. As much as I enjoy putting on polish, I have to admit sometimes it can be a tedious process. Especially when the polish need a few coats more, and it would take forever just to dry. Thanked God for my Seche Vite top coat, which dries nail polishes almost instantaneously.  Speaking of which, the only thing you’ll have to paint for this manicure, is a top coat to protect the nail strips. I must warn you that it is very fragile without it.
IMG_3321
Overall, the polish strips is pretty easy to use. However, they are essentially stickers, so you have to be careful when sticking the strips because once you stick the strips, you cannot adjust it. This means it is important to stick it right and to try to not pull/stretch the strips. The designs may be distorted then. As you can see in the picture above, the strip didn’t really fit my last pinky’s nail and also my middle finger’s nail.
IMG_3341
So far, the strips have gotten a mixed review from me. As much I loved them, there is one flaw in these strips that I cannot accept; they curl the moment I wash my hands. You can really see how it curls up in this picture. Close-up, it’s really hideous looking and it makes me feel like peeling them off already. I have to stop myself from doing so, like seriously. It would have been an almost perfect product if it wasn’t for this flaw.
IMG_3281
Anyway, I fell madly in love with the design for this strips (Glitz Blitz) which is extremely gorgeous. It puts me in a partying mood whenever I look at it because there is tonnes of flakies in these strips. You can actually find similar nail polishes with flakies too, but to achieve the similar even coverage like the strips would require a lot of coats. And that would then make the application of the nail polish uneven. Also, the many coats of nail polish will make it even harder to remove. Hence, I stay away from flakies and glitter all together.
In conclusion, I would say that this is an almost awesome product because of that one flaw that I cannot overlook. But other than that, it would have been close to perfection. However, it retails at RM45.90 which is about the price of an OPI nail polish. These strips only last about 10 days max, but a bottle of nail polish would definitely last longer than that. But if you’re someone who frequents the nail parlour, then, these polish strips can help you achieve the professional manicure with much less hassle.
IMG_3338
And, I finally figured out how and what aperture is and does! Haha, I know I have been shooting for some time and I am expected to learn the basics of this. But really, I couldn’t understand them earlier, until Joe who shot me for my recent photoshoot illustrated to me what aperture was using circles. Heh. A few pictures in this post were the result of my experiment with the aperture. I shot in both f/2 and f/8, just to see the difference. Can you spot which pictures are they?
I took a few other pictures that I want to share with you. :) They are however the usual's poses; with an apple and the lip pose. Heh. Also, the lip pictures are edited and so, it doesn’t show the actual colour of the polish strips.
IMG_3335
IMG_3313edit
IMG_3315

Nail Art: Triangular Matte Shiny Nails

IMG_2989

Can you tell that my nails are fake? Heh. I’m actually not a fan of fake nails because thankfully, I am blessed with strong nails. Hence, if I wanted to, I could grow my nails to that length. So anyway, this nail art was actually done for the shoot that I had with Joe and Pearl. Read about it here! For this nail art, I was inspired by the lines and the cutting of the dress that I wore for the shoot. You’ll know why when the pictures for the shoot are out.

IMG_3005

What I actually did for this nail art was a matte white polish and paint a shiny black polish over it. I’m pretty in love with matte polishes, btw. I won’t be blogging much about this nail art because it is a fairly simple one; I just used stickers to help me to create the triangular lines. But I must say that I didn’t apply the black polishes really well because I actually ran out of it. So, in the next few pictures, the flaws and the streaks are pretty obvious.

IMG_2984

IMG_2988

IMG_2982

Nail Art: Cosmic Inspired

IMG_2386

Just the other day, I stumbled upon a video on a super easy technique to create galaxy look-a-like nails. It’s called the sponging technique for nails, I have actually heard about it for some time, but didn’t give it a try until today. To my surprise, it really is easy and super fun to see the effects as you dab the sponge over the nails. In fact, that is when I got carried away and ended up dabbing more polish than I should. Which explains why there is too much purple glitter. Heh.

IMG_2402

Do you think it looks like galaxy inspired? Or cosmic? I asked around, some couldn’t figure out what it looks like, some thought it was precious stones; like opal and crystal and a few thought it was galaxy-ish. I even had a friend who said graphite. Haha.

IMG_2395

It actually looks different under direct sunlight, and here you can see it. I’m not sure if you can tell which colours I used, can you hints of gold as well? :) And then there is also this blue-ish purple tint, and that polish is just amazing! And I realised I haven’t done a swatch for it, I ought to do it soon.

IMG_2398

IMG_2403

IMG_2404

Ah, I’m so in love with this nail art! Aren’t you?