Showing posts with label Sally Hansen. Show all posts

Review: Sally Hansen’s Miracle Cure Strengthener

sally hansen miracle cure nail strengthener

I hope I do not sound like I’m boasting if I say that I am thankful to be blessed with hard nails; my nails generally don’t break off easily but they do chip and the edges do crack if I’m doing too much house chores. So, when it comes to things like that, product like the Sally Hansen Miracle Cure Strengthener should come in handy. After all, it is supposed to strengthen my nails and prevent it from chipping.

IMG_4633

Review:

  • Brush – First thing I realised about the product was that the brush is long and ridiculously small. Hence, making it harder to apply it on your nails. Especially on the thumb. What more when the instructions given was to apply thin layers. I won’t say it is impossible but it is tough and it’ll need sometime getting used to it.
  • Smell – If you have a bottle of Seche Vite Top Coat and think that it stinks, well, this smells even worse. I have no idea why it smells so bad, could be the chemical used? I sure hope it’s safe.
  • Like I mentioned earlier, I have pretty hard nails so it’ll be hard to judge, for me if the products really works. Somehow after applying the product, it looked like just a shiny coat for my nails. I am not sure if the product works to strengthen the nails (so that the nails will be stronger?) or that it prevents the nails from breaking and chipping because the shiny coat forms a layer that binds and holds the nail together. I think it’s more of the latter, a layer to protect the nails.
  • As such, I used this product as a base coat. But it is not recommended because like I mentioned earlier, it forms a layer. And so, if this product is used as a base coat, you can basically peel the whole polish off your nails.

This is a product I wouldn’t recommend, because I do have another nail strengthener which I use and I personally found them to work really well. That one is from The Face Shop and is much cheaper by one-third compared to Sally Hansen. (Will probably do a review for that soon! Watch out for that.) 

Review: Sally Hansen’s Real Polish Strips - Glitz BlitZ

IMG_3289
After the long wait, Sally Hansen have finally brought in the Real Nail Polish Strip product in! As always, you’ll find newer products being released overseas and boy, do they take some time just to arrive on our shores. Or worst, sometimes they wouldn’t even be sold over here. So, I couldn’t be happier when Yuberactive picked me to review this product in Glitz Blitz. :)
These polish strips are something similar to the stickers. All you got to do is stick these fancy designed strips on your nails. And, that’s it! You now have a very professionally done manicure. Easy peasy, right? Well, that’s the concept anyway. But is it really as easy as it claims to be? Does it last?
IMG_3276
When I first opened the sealed box of the strips, I was greeted by the familiar smell of nail polish. So, in actual fact, these strips are really nail polish and not printed ones because the latter may come off as a bit fake. In each sealed box, there were 8 sizes of nail strips to choose from. To be honest, I felt the sizes were a little limited and most of them didn’t fit my nails. Also, these 8 strips are supposed to be for five fingers. Which leaves me to ask, “What do I do with the strips that do not fit my nails?”
IMG_3278
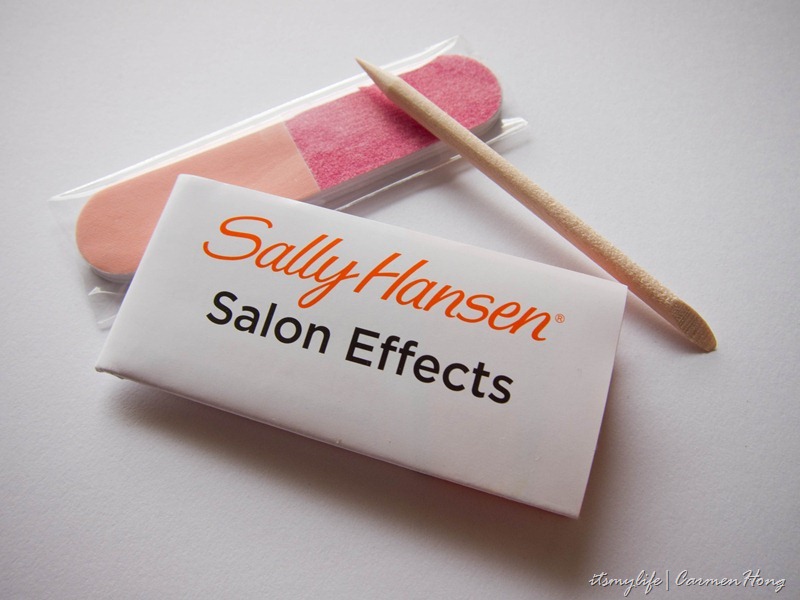
It also comes with an instructions booklet, mini file and a very useful cuticle stick. I won’t be going into the details on how to apply the polish strips because this is a review of the product (heh) and also, the given guidelines were quite direct and easy to understand. However, there was only one confusing part on whether I need to peel the strips off the paper after removing the protective layer. I found out later, that you do indeed need to peel it off and it wasn’t easy to peel it off at all.
IMG_3325
But I must admit, that the process of applying and sticking the strips were quite a fun one. In fact, the very idea that I don’t have to apply and wait for my nail polish to dry appeals very much to me. As much as I enjoy putting on polish, I have to admit sometimes it can be a tedious process. Especially when the polish need a few coats more, and it would take forever just to dry. Thanked God for my Seche Vite top coat, which dries nail polishes almost instantaneously.  Speaking of which, the only thing you’ll have to paint for this manicure, is a top coat to protect the nail strips. I must warn you that it is very fragile without it.
IMG_3321
Overall, the polish strips is pretty easy to use. However, they are essentially stickers, so you have to be careful when sticking the strips because once you stick the strips, you cannot adjust it. This means it is important to stick it right and to try to not pull/stretch the strips. The designs may be distorted then. As you can see in the picture above, the strip didn’t really fit my last pinky’s nail and also my middle finger’s nail.
IMG_3341
So far, the strips have gotten a mixed review from me. As much I loved them, there is one flaw in these strips that I cannot accept; they curl the moment I wash my hands. You can really see how it curls up in this picture. Close-up, it’s really hideous looking and it makes me feel like peeling them off already. I have to stop myself from doing so, like seriously. It would have been an almost perfect product if it wasn’t for this flaw.
IMG_3281
Anyway, I fell madly in love with the design for this strips (Glitz Blitz) which is extremely gorgeous. It puts me in a partying mood whenever I look at it because there is tonnes of flakies in these strips. You can actually find similar nail polishes with flakies too, but to achieve the similar even coverage like the strips would require a lot of coats. And that would then make the application of the nail polish uneven. Also, the many coats of nail polish will make it even harder to remove. Hence, I stay away from flakies and glitter all together.
In conclusion, I would say that this is an almost awesome product because of that one flaw that I cannot overlook. But other than that, it would have been close to perfection. However, it retails at RM45.90 which is about the price of an OPI nail polish. These strips only last about 10 days max, but a bottle of nail polish would definitely last longer than that. But if you’re someone who frequents the nail parlour, then, these polish strips can help you achieve the professional manicure with much less hassle.
IMG_3338
And, I finally figured out how and what aperture is and does! Haha, I know I have been shooting for some time and I am expected to learn the basics of this. But really, I couldn’t understand them earlier, until Joe who shot me for my recent photoshoot illustrated to me what aperture was using circles. Heh. A few pictures in this post were the result of my experiment with the aperture. I shot in both f/2 and f/8, just to see the difference. Can you spot which pictures are they?
I took a few other pictures that I want to share with you. :) They are however the usual's poses; with an apple and the lip pose. Heh. Also, the lip pictures are edited and so, it doesn’t show the actual colour of the polish strips.
IMG_3335
IMG_3313edit
IMG_3315

Review: Sally Hansen’s Manicure Clean-Up Pen

No matter how many times I paint my nails, somehow I would still manage to get some polish on my fingers. I could use a cotton bud or a Q-tip dipped in nail polish remover to remove them, but somehow I am just too lazy. Haha, What I would do is leave them to dry, soak my fingers in the water and then, I’ll peel them off. Yeap, they actually come off quite easily, but I wouldn’t recommend that to anyone because it is not the right way to do it!

IMG_1784

Seeing that dipping cotton buds/Q-tips in remover is too troublesome for a lazy bum like me, a manicure clean up pen by Sally Hansen provide a better alternative for me. Heh. It looks pretty much like a marker pen and works like an eraser for pencil, except this was to remove nail polishes.

page

This how it looks like and it came with two replacement tips, so that you can replace them when it wears out. I am sure you would like to know how the product is, so here is what I thought about this product;

“Personally, I was quite excited with the prospect of an easier alternative to removing the excess polish. The pen, itself was easier to handle and the method of application was pretty much idiot prove. If you know how to write, I’m sure you know how to use this. All you need to do was glide it over the excess polish and it will basically, remove it.

However, when I did just that, it didn’t really remove the polish at all. I tried gliding it a bit more and leaving the tip a bit longer over my fingers. That seemed to work better, but it still did not remove my nail polish as completely and neatly as I would like it to be. So, you could say that I was disappointed with this clean-up pen.

I did, however, found out that if you dipped the tip of the pen in nail remover, it could remove the polishes faster. But then, it brings me back to dipping Q-tips in remover as well. So, I’m basically back to where I started. Meh.

So, to be frank, I wouldn’t recommend this to anyone. Use Q-tips dipped in remover, or be more careful when you apply the polishes. (That applies to me).”

IMG_1781

This is how the tip of the pen looks like after a few times of usage. It turned pink because I was trying to remove my red polishes. Now, you know why they came with two extra replacement tips. Apparently, you’re supposed to wipe the tip after using it, something like cleaning the tip up. But, I found that to be mostly redundant because the polishes basically stained the tip already. Uh-huh.

Nail Art: Keroppi, the Frog.

It has been some time since I did a nail art, but I was pretty inspired by CutePolish's Keroppi nails, (she made it seem pretty easy to do it), so ta-da, here is my nail art. I have to admit that this was the first time I used a brush and my dotting tool for a cartoon inspired nail art, so keep your expectations lower. ;)

IMG_0853

At this point, if you don’t know who or what Keroppi looks like, you could be thinking that this is kind of cute. Also, you don’t understand why are there stripes of red on my white tipped nails.

IMG_0837

“Keroppi Hasunoue (はすの上 けろっぴ Hasunoue Keroppi) is a Sanrio (the same Japanese creator of Hello Kitty) frog character with large eyes and a V-shaped mouth. Keroppi loves adventure, and his bubbly personality makes him popular around Donut Pond.” - Wikipedia

IMG_0851 copy

And now, you get to see a picture of Keroppi! Some of you might be thinking, “Whud, it doesn’t even look similar to the cartoon.” I have to agree, because I wrongly estimated the size of the white dot using my dotting tool. Essentially, it has all the colours but the eyes. T.T

IMG_0839

So, honestly, what do you guys think of the nail art this time? :) And if you are interested in doing this nail art, I’ll show you the polishes that you would need.

IMG_0847

Left to right: Seche Vite; Topcoat, Etude House; WH706  , The Face Shop; WH002 , Sally Hansen; Green with Envy, Nature's Republic; RD502, Etude House; PK011 , The Face Shop; Nail Strengthener (used as base coat).

IMG_0858

Here are the tools I used! I have yet to buy nail art brushes (although I have found the perfect one, I was stupid enough not to buy it at that point of time), so I made my own nail brush. The brush you see here is from an old topcoat bottle, I trimmed it till it was really thin. And the wooden sticks, is obviously my dotting tool.

Water Marbling: Finally successful!

IMG_9481

I actually gave up on water marbling after a disappointing first attempt and a not very successful second attempt. But I have been getting visits to my post on water marbling during my first attempt and it has reached thousands of views already. Quite an achievement for me, so I thought why don’t I give it a try again.

Thankfully, I did and it worked during the first time itself. I’ll be sharing some quick tips on which polish I used. Though, this post is a quickie and I’ll be posting up a full length tutorial once I get my hands on more of Sally Hansen nail polishes! Oh yes, Sally Hansen’s are the only polish that seems to work for me. I have yet to try OPI.

IMG_9483Water Marbling, fresh from the water.

I only have two Sally Hansen’s polishes (Blue It and Green with Envy) at that time, which explains for the weirdly colour combination. Wait till I get my hands on more polishes, then you’ll be seeing better colour combination!

* * * * * * * *

Quick Tips

  1. The water for the nail art should be lukewarm. If it’s cold, most likely the polishes would harden faster.
  2. Use cello tape to tape the edges of the finger so that it won’t end up looking like my finger. :)


* * * * * * * *

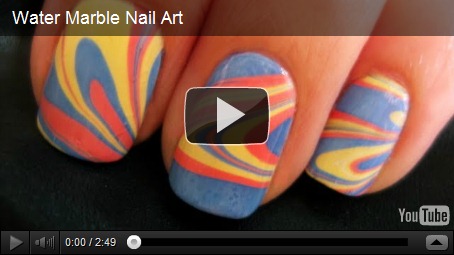
Before I end this post, here is a video from CutePolish’s Youtube channel! Her tutorials make nail art seem easy peasy!

Sally Hansen: Blue It Swatch.

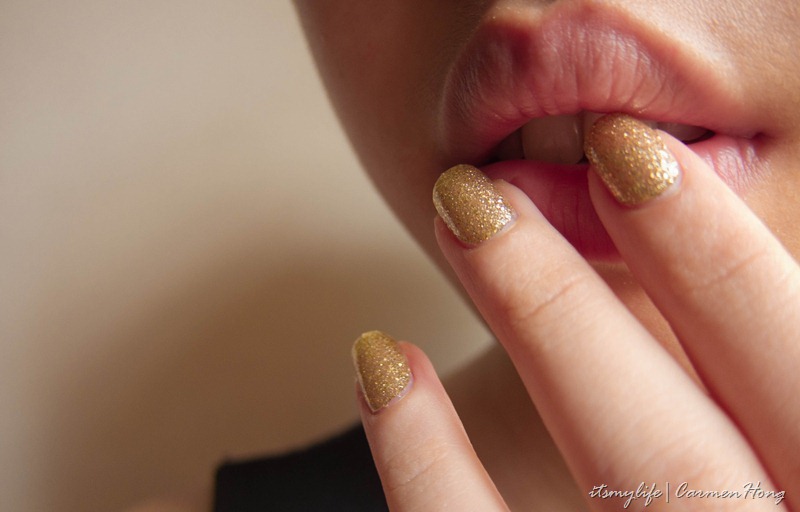
I have not been posting or doing nail arts as often as I liked, simply because I’m just too laden with studies these days. Seeing that I’m taking two papers at one go! So, you imagine double the stress I had from the last semester. But when I received another Sally Hansen Xtreme Wear nail polish in the mail, I simply couldn’t wait to apply it and do a review up.

IMG_9225

Here’s a teaser picture of the nail polish. It’s called Blue It, from the picture you can see that it is a shade of sapphire blue. And would you believe if I told you that my thumb didn’t have any top coat on? :) Oh, yes. It is that shiny on its own. I have previously swatched Green with Envy, from the same Xtreme Range. And I must admit, that the nail polish did not disappoint but instead left me more impressed than ever. The formulation remain the same consistency seen in the Green with Envy swatch earlier. 

IMG_9212

Review: I was particular impressed with this series, having reviewed the Green with Envy nail polish from the similar range (Sally Hanse Xtreme Wear Series) the last time. The sapphire coloured polish contains some glitters, so it is not of single flat tone. Also, I thought the colour was pretty intense, in fact two coats provided sufficient coverage. This time around, I have gotten used to the brush and I was able to glide the polishes a bit more easier compared to the first time. Though I still have gotten used to how small the cap was and how long the stick was, I still felt that it was easy enough to apply the polish comfortably.

IMG_9216

I have to admit that the colour is really gorgeous and frankly, I wouldn’t have bought this colour as I usually stuck to the pastels. But it’s a daring colour, one that would attract tonnes of attention from the girls.

IMG_9221

Are you girls getting bored with the nails on m lips pose yet? :P Haha, I kinda like the effect of my naked face against my eye popping nails. I didn’t have that many picture for this post, mainly because it started getting cloudy and my pictures ended up being too blurry. Next time, I’ll be sure to shoot when the sun is up!

Till next time. xoxo.

Sally Hansen: Green with Envy Swatch.

Sally Hansen copy

I’m seeing green these days, what colour are you seeing? (There was inside joke going around with the girls from college about seeing colours. Haha.) Anyway, I have always loved the green colour and the shades of it too. So, I must say that I was happy when I got to review the Sally Hansen Hard as Nails Xtreme Wear in the colour of “Green with Envy”.

IMG_8907I have to say that I love this shade of green; it is a cheerful and happy colour. If I’m feeling bored, I’ll just look at my nails and I would just smile. (I’m not crazy or anything, but the colour is so bright, you will to.)

IMG_8906Would you believe if I told you that I didn’t have top coat on in this picture? :)

Review: Of all the nail polishes that I have, I don’t actually have one by Sally Hansen. Perhaps one of the reasons was due to the lack of choices in colour (that was available in Malaysia but in US, there is a plenty) and also, I have no idea where to find them.

But I have never been happier to welcome this amazing polish into my collection, mainly because the colour is simply gorgeous. Besides that, this polish is slightly on the thick and creamy side. So, two coats (in the picture, I used two coats as well) would be enough to give a clear and opaque finish. However, it is also prone to air bubbles so you’ll have to be careful and apply thinner and lighter strokes. And I also didn’t really like the brush for the polish (or maybe it just need time to get used to.. since it is quite different from the rest). The brush is thick but not as flexible as I would like it to, and because of that, it is quite hard to apply the polish on the sides of my nails. And oh, this polish is surprisingly easy to remove despite how highly pigmented it was. So much more loves for the polish because of that is a major plus point for me.

Anyway, this polish is from the Xtreme Wear series, so I decided to wear the polish without the top coat to see how long it would last without peeling off or even chipping off. Right now, I'm at Day Three of the polish and it still looks almost as good as new (albeit less shiny since there is no top coat). I'll be posting some follow up pictures for you to see the difference after a few days (maybe weeks?) with the polish.

IMG_8905This polish is almost perfect, it’s shiny without a top coat and it lasts so long! The only downside, is that it stays on pretty for such a long time that I don’t have a chance to change my nail polish.